Preparing AWS
Establish your AWS account, organization, and admin access credentials.
Create your First AWS Account
An “AWS account” is the basic unit of encapsulation for AWS infrastructure. All AWS infrastructure exists in exactly one account.
Follow this guide to create your first AWS account.
From here on, we will refer to this account as the management account.
The email and password you used to create this account are referred to as root credentials. Keep these handy.
Create an AWS Organization
If you already have an AWS organization, you may skip this step. However, make sure that you have AdministratorAccess to your organization’s management account.
An AWS organization allows you to centrally manage a set of AWS accounts from a central management account. This provides an easier mechanism to manage billing, security, and compliance needs. For more information, review the AWS documentation on organizations.
Follow Step 1 from this guide.
You do not need to create organizational units (OUs) or governance policies at this phase.
Create Additional AWS Accounts
You will want to create one account for each environment your organization intends to use.
An environment is a set of infrastructure components that is isolated from the infrastructure components of other environments. In other words, what happens to one environment should not impact what happens to another.
Here are some guidelines to think about as you are choosing your set of environments:
You can always add more as needed in the future.
You will always have the
managementenvironment which contains root configurations for many utilities such as AWS. This includes the initial AWS account that you created above.If you are a solo developer or early stage team, you might need just one additional environment:
production. This environment would receive new changes immediately and make them live to all users.As your organization scales, you will likely want to adopt the practice of promoting changes across a set of environments. We recommend the following setup:
development: The integration environment. New changes are immediately deployed to this environment and made available to internal stakeholders. If you follow GitHub flow , code merged to yourmainbranch gets deployed here.staging: (Optional) If you have end-to-end test suites, code fromdevelopmentwill be periodically promoted here to test for production-readiness. It is important to keep a dedicated environment for end-to-end tests as you will frequently reset the environment to a clean starting state which may cause collaboration problems if done directly indevelopment.production: Once testing indevelopment(orstaging) has been completed, changes are promoted toproductionto make new code live to all users.
If you have a really large organization, you might create separate sets of
development,staging, andproductionenvironments for each organization unit. Typically, this would be done only when each organization unit is managed completely independently of one another.
Once you have decided on the set of environments, use the following steps to create the associated AWS accounts:
Login to your management account using your root credentials.
Navigate to the AWS Organizations pane.
Navigate to the AWS accounts tab in the sidebar. You should see something that look like the below image. Notice that you should also see “management account” label in your account list.

Select “Add an AWS account” to create one account for each additional environment. Choose semantic names like
<your_organization>-development. Ensure that you have access to the email addresses you enter for each account’s root user / owner.When you create an account, AWS Organizations initially assigns a long (64 characters), complex, randomly generated password to the root user. You can’t retrieve this initial password. To access the account as the root user for the first time, you must go through the process for password recovery. Complete the password reset and save the password in a secure location.
Save the AWS account ID for quick reference as we will need it in the later guides.
Create Access Keys for Each Account
Eventually, we will hook up single sign-on (SSO) for each account, and you will no longer need to manage static credentials. However, we do need to begin provisioning infrastructure before we reach that step.
To do this, we need access keys that will allow your CLI tooling such as OpenTofu (Terraform) to work.
Repeat the following steps for every account:
Login to the account as the root user
Use the dropdown in the top right to access the “Security credentials” pane
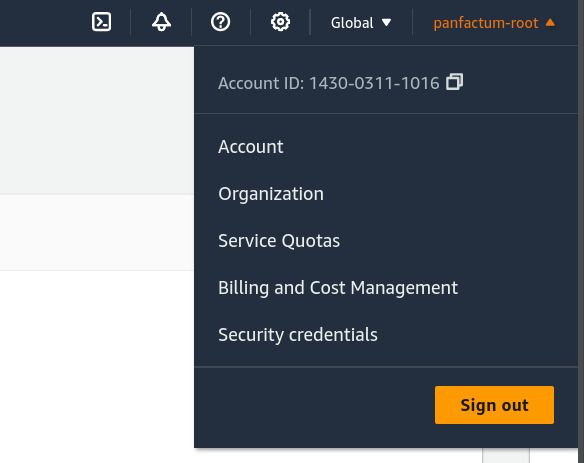
Now is the perfect time to set up MFA for the root user. This is incredibly important as this user will (a) always exist and (b) have complete access to all of your AWS systems. Select “Assign MFA device” from the Multi-factor authentication section and complete the setup for your desired second factor.
Next you will create an Access key via “Create access key.”
You will receive a dialog warning that “Root user access keys are not recommended.” Don’t worry. Once we have SSO established, we will remove these access keys permanently and prevent anyone in your organization from needing static AWS credentials.
Save both the access key id and secret access key in a safe place. We will need them in the next steps.
Open your stack repo locally. We will be setting up your AWS configuration and credentials files in the
.awsdirectory of your repository. We keep this configuration in the repo so that it does not interact with other settings already present on your computer.In this directory, create a file called
config. For each account you created, add a block that matches the pattern below. Replace<profile_name>with a profile name matching the format<environment_name>-superuser(e.g.,development-superuser). Replace<aws_region>with the main AWS region you will be interacting with (e.g.,us-east-2).[profile <profile_name>]region=<aws_region>output=textIn this directory, also create a file called
credentials. For each profile you created add a block that matches the below pattern. Replace<profile_name>with the profile name chosen in the previous step (note there is no precedingprofilestring). Replace<access_key_id>and<secret_access_key>with the keys you created for this account.[<profile_name>]aws_access_key_id=<access_key_id>aws_secret_access_key=<secret_access_key>[profile <profile_name>]region = <aws_region>output = textThe
awsCLI is already installed by the Panfactum developer environment.To instruct the CLI to use a certain set of credentials, set the active profile by setting the
AWS_PROFILEenvironment variable:export AWS_PROFILE=<profile_name>. Alternatively, you can pass the--profileCLI flag.For each profile, verify that the credentials work by running
aws --profile=<profile> sts get-caller-identity. You should receive a result that looks as follows (with values specific to your organization:143003111016 arn:aws:iam::143003111016:root 143003111016
We require naming your AWS profiles with the form <environment_name>-superuser as this will match the format that your SSO profiles will take once enabled later in the guide. Failing to name your AWS profiles using this format will cause errors later.
Next Steps
Once you are able to successfully utilize the aws CLI to interact with each account, you are ready to configure terragrunt to begin deploying infrastructure.