Federated Auth
Connect AWS, Kubernetes, and Vault to Authentik to enable single sign-on (SSO) and unified role-based access control (RBAC).
Background
Every federated authentication configuration comes in two parts:
a module for setting up the authentication provider in Authentik
a module for setting up the authentication receiver in the service provider
These are split in two because the modules will often be deployed in different environments. The Authentik half will always be deployed in the same environment as your Authentik instance while the service provider half will be deployed in the same environment where the service provider is deployed.
Let’s get started.
AWS
You will only need to complete this section ONCE for your AWS organization.
If you are deploying the Panfactum stack in a pre-existing AWS organization, you might already have AWS IAM Identity Center configured. While we recommend the setup detailed here, you can choose to keep your existing configuration. However, you will need to manually add your SSO roles as inputs to:
aws_eks to allow SSO authentication with the cluster KMS encryption key.
sops keys (deployed with aws_kms_encrypt_key) to allow SSO authentication with the sops KMS encryption key.
kube_vault to allow SSO authentication with the Vault KMS unseal key.
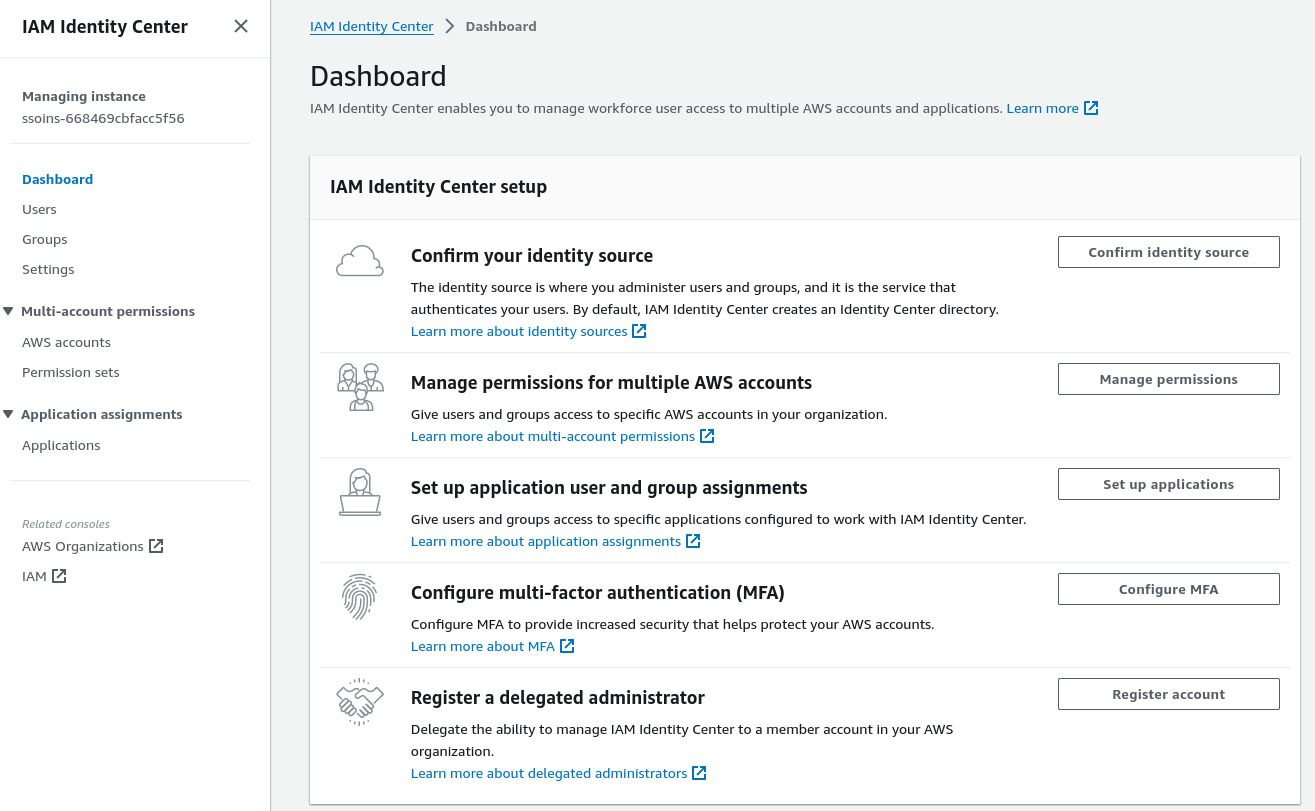
Enable AWS IAM Identity Center
If you were previously using AWS IAM Identity Center and are migrating to the configuration provided by the Panfactum Stack, remove all existing users, groups, and permission sets. These may conflict with the resources created in the below steps and create errors.
AWS IAM Identity Center is the AWS mechanism to log into your AWS organization from an external identity provider. Unfortunately, it does not have a robust configuration API, so we will have to configure several settings manually before we can begin deploying infrastructure-as-code.
Let’s do this now:
Log into the AWS web console of your management account. Switch to the AWS region you have set in your
globalTerragrunt region (i.e., theaws_regionvalue in yourmanagement/global/region.yamlfile).Navigate to the IAM Identity Center service:
Follow these instructions to change your access portal url. This is the URL that your organization will use to access AWS. You cannot change this later.
Select “Settings” from the side panel.
Under the “Identity Source” tab, select “Change Identity Source” from the “Actions” dropdown.
Select “External Identity Provider.”
Keep this page open as you will need to reference the values and upload an IdP SAML metadata file provided by Authentik in the following section.
Deploy AWS Provider in Authentik
We have a module for configuring Authentik to work with Identity Center: authentik_aws_sso.
Let’s deploy it now:
Add a new
authentik_aws_ssofolder adjacent to yourauthentik_core_resourcesfolder.Add a new
terragrunt.hclfile that looks like this:9 collapsed linesinclude "panfactum" {path = find_in_parent_folders("panfactum.hcl")expose = true}terraform {source = include.panfactum.locals.pf_stack_source}dependency "authentik_core" {config_path = "../authentik_core_resources"}dependency "kube_authentik" {config_path = "../kube_authentik"}inputs = {// Set to the "IAM Identity Center Assertion Consumer Service (ACS) URL" from the page you opened in the prior section.// Example: https://us-east-2.signin.aws.amazon.com/platform/saml/acs/95dd9da3-94ec-448b-9449-6564c5630e9baws_acs_url = "REPLACE_ME"// Set to the "AWS access portal sign-in URL" from the page you opened in the prior section.// Example: https://panfactum.awsapps.com/startaws_sign_in_url = "REPLACE_ME"// Set to the "IAM Identity Center issuer URL" from the page you opened in the prior section.// Example: https://us-east-2.signin.aws.amazon.com/platform/saml/d-9a6709eac6aws_issuer = "REPLACE_ME"aws_scim_enabled = falseorganization_name = dependency.authentik_core.outputs.organization_nameauthentik_namespace = dependency.kube_authentik.outputs.namespacemedia_configmap = dependency.kube_authentik.outputs.media_configmapauthentik_domain = dependency.kube_authentik.outputs.domainallowed_groups = ["superusers","privileged_engineers","engineers","restricted_engineers","billing_admins"]}Run
pf-tf-initto enable the required providers.Run
terragrunt apply.Log into the Authentik admin dashboard. Navigate to Applications > Providers and select the
awsprovider: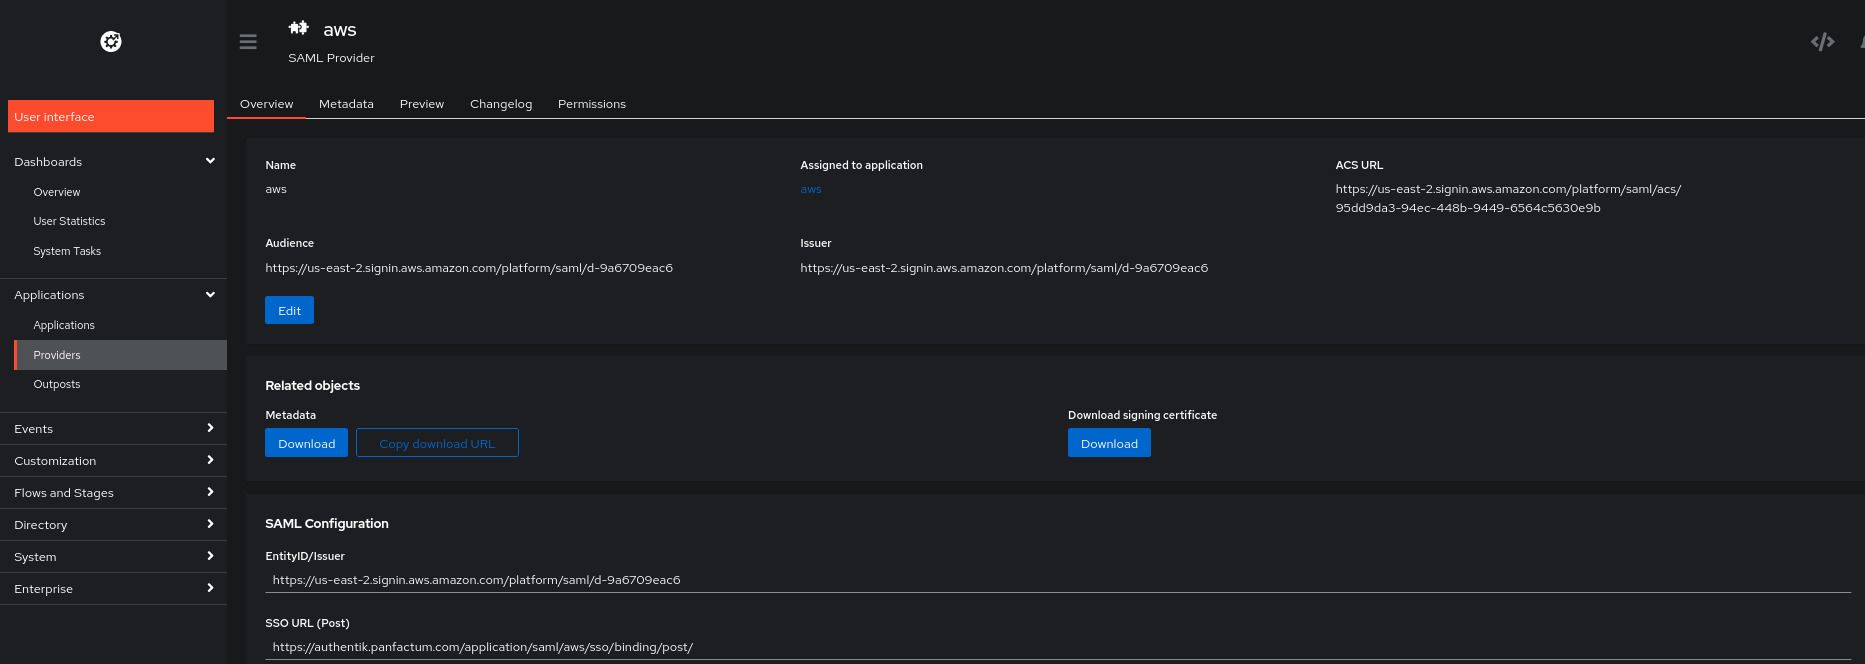
Under “Related objects,” click the “Download” button for the Metadata object.
Return to the AWS IAM Center page opened in the prior section. Under “IdP SAML metadata,” there is a “Choose file” button. Use that button to upload the metadata you just downloaded from Authentik. After that uploads, click “Next.”
Type “ACCEPT” and click “Change identity source.”
On the settings page, you should now see a pop-up titled “Automatic provisioning”. Select the “Enable” button.

This will provide you configuration options for setting up SCIM, a method for synchronizing users and groups across services.
Enable SCIM in the
authentik_aws_ssomodule.17 collapsed linesinclude "panfactum" {path = find_in_parent_folders("panfactum.hcl")expose = true}terraform {source = include.panfactum.locals.pf_stack_source}dependency "authentik_core" {config_path = "../authentik_core_resources"}dependency "kube_authentik" {config_path = "../kube_authentik"}locals {secrets = yamldecode(sops_decrypt_file("${get_terragrunt_dir()}/secrets.yaml"))}inputs = {11 collapsed lines// Set to the "IAM Identity Center Assertion Consumer Service (ACS) URL" from the page you opened in the prior section.// Example: https://us-east-2.signin.aws.amazon.com/platform/saml/acs/95dd9da3-94ec-448b-9449-6564c5630e9baws_acs_url = "REPLACE_ME"// Set to the "AWS access portal sign-in URL" from the page you opened in the prior section.// Example: https://panfactum.awsapps.com/startaws_sign_in_url = "REPLACE_ME"// Set to the "IAM Identity Center issuer URL" from the page you opened in the prior section.// Example: https://us-east-2.signin.aws.amazon.com/platform/saml/d-9a6709eac6aws_issuer = "REPLACE_ME"aws_scim_enabled = true// Set to the "SCIM endpoint" from the previous step.// Example: https://scim.us-east-2.amazonaws.com/Hw59fdecb43-083d-4307-b59f-ef4a9eb90ca6/scim/v2/aws_scim_url = "REPLACE_ME"// Set to the secret "Access token" from the previous step. Ensure that you save it in an encrypted// sops file (secrets.yaml) and read it as shown above.aws_scim_token = local.secrets.aws_scim_token12 collapsed linesorganization_name = dependency.authentik_core.outputs.organization_nameauthentik_namespace = dependency.kube_authentik.outputs.namespacemedia_configmap = dependency.kube_authentik.outputs.media_configmapauthentik_domain = dependency.kube_authentik.outputs.domainallowed_groups = ["superusers","privileged_engineers","engineers","restricted_engineers","billing_admins"]}aws_scim_token: ENC[AES256_GCM,data:XXYaGpMGySIuo6jBzlT/bNAUfBF4p9UwPHWVReuw4SelCfXtntkBWDiol7y418xuStPbjUEg3sh0xfm4V2fbmLo5CtWyZgimtqYpIoKD3M9skQ453IxRo2XtMW3GYdSdUPqbkgivKzfgTJupTabuh6LUQZRBh/TsPl0qoDxlc7jfDOk8VX7Q8gmha6tg/ZnRQ/5DtxuSUmM1U+RTev4x5PEi8N/mskfUoN4015G1yn8KrwDcGFr+VIpiYZj6V0rIFEBpSOK57nd0tfTcbyo/81lWxmvnq1G/EO+wBUS91g8IcBxUwJOqT40b7wS9T76QSvmuF30uMSM38NWRPZV0XxImhH1zM3aBFIVtcetwcpAmPzjPBa/TxK0B70ILJDevKPDnjDweVPlJFMgdd5uU/vL48me3vZA30bTTzpprpfFFi5vStihlkGtGmzSsoHB+q3luZHMFGQklRDNc2Wq3wqNsHyeIlAgBujSlJ4Kx8x82XmmzgiqM3V4wNP21NSR73z7kXgXkdGUIqNahuIzx5nRENd1Sj/O3qL28sb03rKnM/BPSeY3iouv5zkHhRV/OnCruB21gqh7eCpA9wjr5FXTV97rKBp3sNCZYRIiAFSqPk4gsX6QMKaNExscPO2pyoj0BmYDGEyVdJ9Ec7nhC41XgrshzgpqTQQM/aXoCYjUwWM50+NZXrifqxBTMJXVsx3JjpRY9jBfXQJDl82nOA/kApow14BVd15USqharfe2sYxkddMoW5AiMr/ftn68DBfBXZ6zr6g==,iv:YBAm+LTkaSbkzPZR7yqJAzTGBkIXcszZMSdg0rIqXA0=,tag:F33Rr0vts1NCdK0RFcoj2w==,type:str]sops:kms:- arn: arn:aws:kms:us-east-2:891377197483:key/mrk-d8075b5c1dc8468db33448f40ae92b5ccreated_at: "2024-04-12T19:51:50Z"enc: AQICAHiO33BhcW4FdrQk4VmdZqD44nTqvEUzee/kwr4reXJeMQG90CFCzP573t/U1v0tdp/xAAAAfjB8BgkqhkiG9w0BBwagbzBtAgEAMGgGCSqGSIb3DQEHATAeBglghkgBZQMEAS4wEQQM4lCgFdzEK5M7WFhQAgEQgDutaddLGr11As5LdlkrZ30jY2ulbB7++paPBQaezNsHdTeUh5AYYpMbDqk99mn2lIEFJTM/BqIQFT/Cdg==aws_profile: production-superuser- arn: arn:aws:kms:us-west-2:891377197483:key/mrk-d8075b5c1dc8468db33448f40ae92b5ccreated_at: "2024-04-12T19:51:50Z"enc: AQICAHiO33BhcW4FdrQk4VmdZqD44nTqvEUzee/kwr4reXJeMQHHO+DZZsE0iNyh+nxZpax/AAAAfjB8BgkqhkiG9w0BBwagbzBtAgEAMGgGCSqGSIb3DQEHATAeBglghkgBZQMEAS4wEQQM7b6BpFsWxPM54O5PAgEQgDvgF7G3lqydTjiy0bfuzSMmqLnSWofHjaHhtQVZ+mnkbwDdc0BYqlft8qZ99Y9mxL3vYVapugEPM7ypdw==aws_profile: production-superusergcp_kms: []azure_kv: []hc_vault: []age: []lastmodified: "2024-04-12T19:51:50Z"mac: ENC[AES256_GCM,data:dA4H6Fw03CLcT+WJ5dT0hvTvDBZMB+SWABrw3Jckaq4DGKIhRv+lYI+0PhxwUMwgxw3j1VL+2hj94ik3IPxtSrB+IHXIZ3BlRAbvlVOuWIfd+g32XVNEqetHaY18J07aNBwHrVcjdgqwema1MLIiFKAqLYFTGXjilrAhW1/KI/w=,iv:BvzlspeexbA2mBchw3nkMC+uOIVeMhLgtlNhiiihjeI=,tag:67ZeOZwIk7EOzjdPJrgZ6g==,type:str]pgp: []unencrypted_suffix: _unencryptedversion: 3.8.1Re-apply the module via
terragrunt apply.In the Authentik dashboard, you should see a new provider called
aws-scim(under Applications > Providers). Select it.You will see “Sync status” as not yet synced. Click “Run sync again.”

SCIM will fail if any of your users have the same email as the root user for any of your AWS accounts. Ensure that the root users have globally unique email addresses.
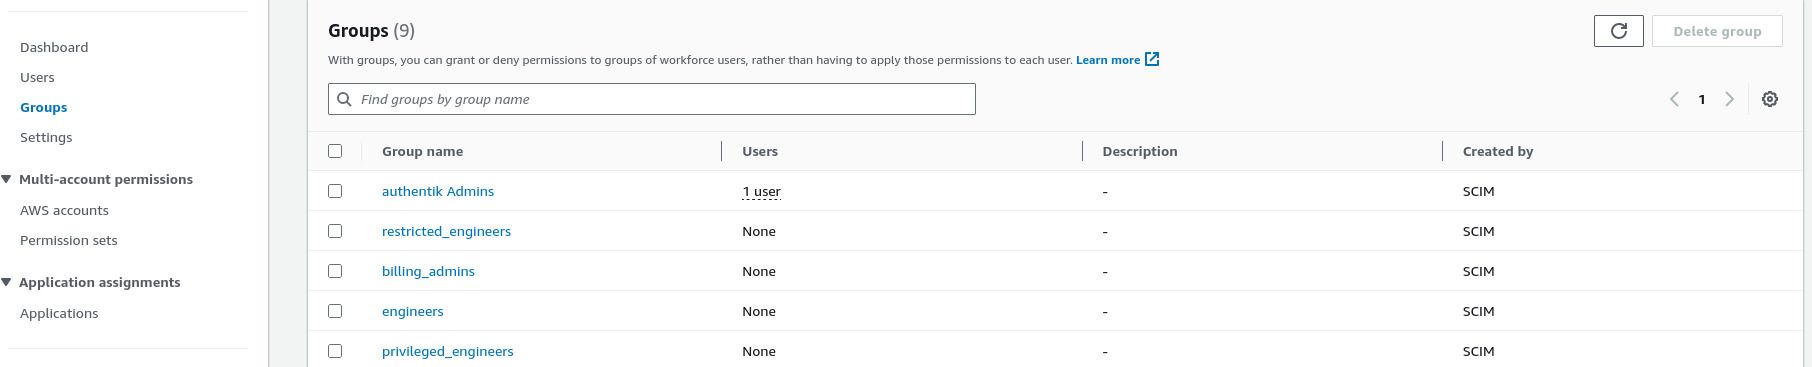
After a few moments, you should see the users and groups populated in AWS Identity Center:
To verify that SSO works, return to the Authentik page and select “User interface” to return to the normal user dashboard. You should see an app for AWS:
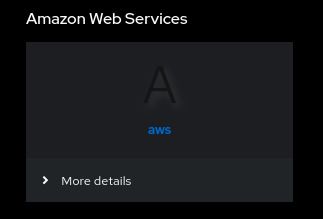
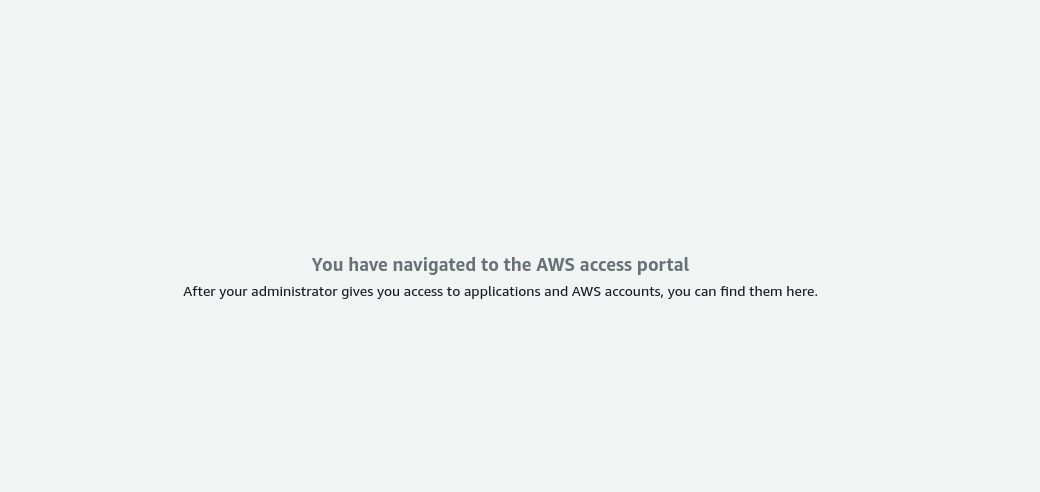
Click the app, and you should successfully log in to the AWS access portal. However, you will not yet have access to any accounts just yet.
Configure AWS Identity Center Permissions
We will now configure permissions in AWS Identity Center to allow your users access to accounts in your AWS organizations. Fortunately, AWS does expose APIs for this, so we can provide an infrastructure module to automatically set this up: aws_iam_identity_center_permissions.
Let’s deploy it now:
Add a new
aws_iam_identity_center_permissionsfolder to management environment in the global region.Add a new
terragrunt.hclfile that looks like this:9 collapsed linesinclude "panfactum" {path = find_in_parent_folders("panfactum.hcl")expose = true}terraform {source = include.panfactum.locals.pf_stack_source}inputs = {// IMPORTANT! Edit this configuration your organization's// unique needs. See below for instructions.account_access_configuration = {management = {account_id = "REPLACE_ME"superuser_groups = ["superusers"]restricted_reader_groups = ["privileged_engineers", "engineers"]billing_admin_groups = ["billing_admins"]}production = {account_id = "REPLACE_ME"superuser_groups = ["superusers"]admin_groups = ["privileged_engineers"]reader_groups = ["engineers"]restricted_reader_groups = ["restricted_engineers", "demo_users"]billing_admin_groups = ["billing_admins"]}development = {account_id = "REPLACE_ME"superuser_groups = ["superusers","privileged_engineers","engineers"]admin_groups = ["restricted_engineers"]billing_admin_groups = ["billing_admins"]}}}For the
acccount_access_configuration, we recommend setting this up according to our RBAC recommendations, but you have the flexibility to choose what works best for your organization.Each top-level object is an AWS account that you have created. You will likely have different accounts than what we use in our reference
terragrunt.hcl.The top-level key (e.g.,
production) is for reference only. Theaccount_idvalue determines the account.The remaining values determine which Authentik groups get assigned which roles in the specified account. For descriptions of the roles, see this reference document. You must have already allowed these groups access to AWS in the
authentik_aws_ssomodule above.
Run
pf-tf-initto enable the required providers.Run
terragrunt apply.
When you set up the AWS IAM Identity Center at the beginning of this guide section, it becomes bound to a single AWS region. If this region is different than the AWS region used in your global region, you will run into the following error:
Error: Invalid index││ on main.tf line 12, in locals:│ 12: sso_instance_arn = tolist(data.aws_ssoadmin_instances.main.arns)[0]│ ├────────────────│ │ data.aws_ssoadmin_instances.main.arns is empty list of string││ The given key does not identify an element in this collection value: the│ collection has no elements.You can fix this by setting the aws_region value to the AWS IAM Identity Center region in a module.yaml file for aws_iam_identity_center_permissions.
Refresh the AWS access portal, and you will now see you have SSO access to your AWS accounts:

Configure Developer Environment for AWS SSO
We will now configure your organization’s local development environment to take advantage of dynamically provisioned SSO credentials and roles and stop using your static root access keys.
For every Kubernetes cluster that you have already deployed, re-apply the
aws_eksmodule. This will automatically pick up the new AWS roles and give them equivalent access to resources in the Kubernetes cluster. Failure to complete this step will cause you to lose access to your clusters.As AWS KMS keys are special resources that require explicit permission grants, you must re-apply every module that make use of KMS keys in order to pick up the new SSO roles. In this guide, that would be the following modules:
sops keys deployed with the aws_kms_encrypt_key module
Vault clusters deployed with kube_vaults
Run
pf-update-awsto scaffold files in youraws_dirdirectory.Copy the generated
config.example.yamlfile toconfig.yaml.Set up
config.yamlaccording to these reference docs. Here is an example file:sso_start_url: REPLACE_ME # Found in your AWS IAM Identity Center dashboard page.sso_region: REPLACE_ME # MUST be the AWS IAM Identity Center region. Found in your AWS IAM Identity Center dashboard page.default_aws_region: REPLACE_ME # Can be any AWS regionmodule: management/global/aws_iam_identity_center_permissionsRun
pf-update-aws --build. This will automatically generate your<aws_dir>/configfile to support all SSO roles (file format).Profiles names are of the format
environment-roleand can be used likeaws --profile production-superuser .... You will first need to runaws --profile <profile-name> sso loginand complete the login flow before running commands under a given SSO profile.The
configfile is safe to commit to version control. It does not contain any secret information.Let’s test the new SSO configuration with
aws --profile management-superuser sso login. This login should complete successfully.Ensure that you adjust your
<kube_dir>/config.user.yamland terragrunt variables to reflect the generated profile names:clusters:- name: "production-primary"aws_profile: "production-superuser"Verify that you still have Kubernetes connectivity by running
kubectl cluster-infofor every cluster (after runningpf-update-kubeto reflect any changes to your<kube_dir>/config.user.yaml).Let’s finally de-provision your static root user credentials.
Delete
<aws_dir>/credentialswhich contains your static credentials.Using each AWS account’s root user, login to the AWS web console, select the rop-right dropdown, select “Security credentials,” and delete the AWS access key provisioned at the start of this guide series.
In the event of a disaster, you can still re-provision these credentials via the web console. However, since they can easily become a security vulnerability, it is best delete them when not needed.
In general, your terragrunt variables for AWS profiles should use the <environment>-superuser roles as some modules will require superuser privileges to run. This is the default and should already have been configured earlier in the guide. Your organization’s users can override this profile in their personal environment.user.yaml files if they need to run terragrunt but do not have superuser access. See this guide for more information.
Vault
You will need to complete this section for every Vault cluster you have deployed.
Deploy Vault Provider in Authentik
We have a module for configuring Authentik to serve as the IdP for Vault clusters: authentik_vault_sso.
Let’s deploy it now:
For every Vault cluster, add a
authentik_vault_sso_<cluster_name>folder adjacent to yourauthentik_core_resourcesfolder.Add
terragrunt.hclandmodule.yamlfiles that looks like this:9 collapsed linesinclude "panfactum" {path = find_in_parent_folders("panfactum.hcl")expose = true}terraform {source = include.panfactum.locals.pf_stack_source}dependency "kube_authentik" {config_path = "../kube_authentik"}dependency "authentik_core" {config_path = "../authentik_core_resources"}inputs = {authentik_namespace = dependency.kube_authentik.outputs.namespacemedia_configmap = dependency.kube_authentik.outputs.media_configmaporganization_name = dependency.authentik_core.outputs.organization_nameauthentik_domain = dependency.kube_authentik.outputs.domain# Every one of your Vault clusters must have a unique namevault_name = "REPLACE_ME"# Must be a subdomain of your environment's domain# Example: vault.prod.panfactum.comvault_domain = "REPLACE_ME"# Provide *all* the groups that you want to allow to access the particular Vault cluster (we will assign roles later).allowed_groups = ["superusers","privileged_engineers","engineers","restricted_engineers"]}# Must be set since the directory name is not authentik_vault_ssomodule: authentik_vault_ssoRun
pf-tf-initto enable the required providers.Run
terragrunt apply.
Deploy Vault OIDC Login Configuration
We also provide a module to configure Vault to work with the above Authentik configuration: vault_auth_oidc.
Let’s deploy it now:
For every Vault cluster, add a
vault_auth_oidcfolder adjacent to itskube_vaultfolder.Add new
terragrunt.hcland sops-encryptedsecrets.yamlfiles that looks like this:9 collapsed linesinclude "panfactum" {path = find_in_parent_folders("panfactum.hcl")expose = true}terraform {source = include.panfactum.locals.pf_stack_source}dependency "vault" {config_path = "../kube_vault"skip_outputs = true}locals {secrets = yamldecode(sops_decrypt_file("${get_terragrunt_dir()}/secrets.yaml"))}inputs = {// Note: If the modules are not in the same environment, you will need to copy// the relevant outputs from `authentik_vault_sso`// (via `terragrunt output -json` to get the secrets) into the `terragrunt.hcl`// and make sure you encrypt the `client_secret` with sops.// The `client_id` output from `authentik_vault_sso`// Example: 06fcaxxxeaee0113client_id = "REPLACE_MET"// The `client_secret` output from `authentik_vault_sso`// Example: XXXXXXXXXXXXXXXXXXXXXXXXXXXXXXXXxclient_secret = local.secrets.client_secret// The `oidc_discovery_url` output from `authentik_vault_sso`// Example: https://authentik.panfactum.com/application/o/vault-primary/oidc_discovery_url = "REPLACE_ME"// The `oidc_discovery_url` output from `authentik_vault_sso`// Example: [// "https://vault.prod.panfactum.com/ui/vault/auth/oidc/oidc/callback",// "https://vault.prod.panfactum.com/oidc/callback",// "http://localhost:8250/oidc/callback"// ]oidc_redirect_uris = [REPLACE_ME]// The `oidc_issuer` output from `authentik_vault_sso`// Example: https://authentik.panfactum.com/application/o/vault-primary/oidc_issuer = "REPLACE_ME"// See below instructionssuperuser_groups = [REPLACE_ME]admin_groups = [REPLACE_ME]reader_groups = [REPLACE_ME]restricted_reader_groups = [REPLACE_ME]}client_secret: ENC[AES256_GCM,data:o0WIq8WQw7ToDb65Oz5H0JrTLmVUMZoZCUB3glIWVp1gj9/JkOdcNlBAUqn6Dwh5Hz2TXIKnZ77hvGdwnV/7whD0S5ltGEkTc/7sKKgc50MJsVyNxcCZuezh5NQiHlmpKsIQIa+xXsa+mxyJwQDvbqJ4YGiXd6GjZcWBhpHHncw=,iv:QPXGiUtEwXj9h+Sg1vgynKt5JdvtBzWt6/i9/vgb1jE=,tag:naxk2hjfE2S88F4MIOZSaQ==,type:str]sops:kms:- arn: arn:aws:kms:us-east-2:471112902605:key/mrk-9cb675458a2b480ba6df9162e0122deecreated_at: "2025-02-24T18:30:43Z"enc: AQICAHh86KuTi8Z88iNHPYXdu1XpVFjv3Aax24dfJJ8cPst7fwH09ojkjExrc5r2k4na6s1nAAAAfjB8BgkqhkiG9w0BBwagbzBtAgEAMGgGCSqGSIb3DQEHATAeBglghkgBZQMEAS4wEQQMURDz5GZ03DygMWgAAgEQgDvGAHYALQ/J6s3KWXuF61BzSUJHigMGaAmioBNe4LlBTfh4yz4pZnaUS+/CyFZwejG4Eo8Vk5mdI3aU7g==aws_profile: development-superuser- arn: arn:aws:kms:us-west-2:471112902605:key/mrk-9cb675458a2b480ba6df9162e0122deecreated_at: "2025-02-24T18:30:43Z"enc: AQICAHh86KuTi8Z88iNHPYXdu1XpVFjv3Aax24dfJJ8cPst7fwFU6zO2YCx2fLZVzWPZFMH/AAAAfjB8BgkqhkiG9w0BBwagbzBtAgEAMGgGCSqGSIb3DQEHATAeBglghkgBZQMEAS4wEQQMQvQvI9PmA1k/2Z3nAgEQgDs8jEixzMxFgSYeV0oNYC/3Sf7CnsFt4UYL3JBz/4MraVrGHDR0vAbbXLAZGFDiU6Ap/s7dXIGQHSvoOQ==aws_profile: development-superusergcp_kms: []azure_kv: []hc_vault: []age: []lastmodified: "2025-02-24T18:30:45Z"mac: ENC[AES256_GCM,data:jRg6qhnueEe/lwQbJCqMKon/ijyp/66FP0qtlopmqfKmCeSV+Mdmhq+oMo0crC/oGomOOzZb25iz4hsZPmdUE4i1UgKvnSR33zDSjo3GX+TPuYxHXVN3Whw+y1QLQTFCeB36sPoHD8voswEUNLa91iVE0naUVjKiDeADl4RN2wk=,iv:ViOheAB5OgwDsdwD8oDBYYvFFLvLpfFifzYdmf594x0=,tag:1ArVhWX0k1MuWnYaECRzYw==,type:str]pgp: []unencrypted_suffix: _unencryptedversion: 3.9.1Set the
superuser_groups,admin_groups, andreader_groupsas appropriate.Note that these permissions will grant access to all databases created by Panfactum modules.
admin_groupswill get read and write access.reader_groupswill only receive read access.Additionally, note that we do not have
restricted_reader_groupsorbilling_admin_groupsas Vault contains only sensitive information.Run
pf-tf-initto enable the required providers.Run
terragrunt apply.To verify that SSO works, visit the Vault web UI. Select the OIDC method and then click “Sign in with OIDC Provider.” This should open a pop-up that enables you to authenticate with Authenticate. After signing in, you should be redirected to the Vault web dashboard.
Configure Developer Environment for OIDC Auth to Vault
Remove your hardcoded
VAULT_ADDRandVAULT_TOKENtoken from your.envfile. Make sure that you added thevault_addrin youregion.yamlas covered in the inbound networking section.VAULT_ADDR=vault.example.comVAULT_TOKEN=hvs.XXXXXXXXXXXXXXXXXXTerragrunt will automatically work with the new SSO login flow. Test this by re-applying the
vault_auth_oidcmodule.To use the
vaultCLI directly, you will need to set theVAULT_ADDRenvironment variable and runpf-get-vault-tokento retrieve a dynamically generated credential. From there, you can run vault commands directly (you do not need to specify the token as it is saved on disk). Test this now by runningvault operator members.Now you will need to revoke the root token generated when you initialized Vault. It is not safe to keep this static credential live. Run
vault token revoke <your_root_token>to complete the revocation.
Additional Systems
The purpose of an identity provider like Authentik is to be the single source of truth for identity and access management in your organization. While we only provide Authentik modules for components of the Panfactum stack, Authentik provides robust documentation for 100+ common service provider integrations such as with Google, Azure, GitHub, etc. Additionally, Authentik provides support for all the standard federated authentication protocols so its nearly guaranteed that it will be able to integrate with any system.
Check out their integration documentation here.
You should take some time to configure this for your other service providers.
Next Steps
Congratulations! You have successfully configured federated authentication, unified your RBAC, and removed most of the static credentials from your ecosystem. In the next section we will do a final review of the Panfactum bootstrapping process and recommend some next steps.