DNS
Establish a domain name, setup subdomains, and delegate control of subdomains to AWS accounts.
Background
Domain Name Service (DNS) is what allows you to connect to networked services by human-readable names (e.g., panfactum.com) instead of IP addresses (1.2.3.4). It also plays an important role in X.509 certificate infrastructure which underpins security on the modern internet (e.g., TLS/SSL).
AWS Route 53 is AWS’s suite of DNS utilities. It includes both a registrar (an organization that allows you to lease domain names) and a managed DNS server (Hosted Zones) for hosting individual DNS records.
Purchase Domain Name(s)
If you already have a domain but from a different registrar, you can follow this guide to transfer the domain to AWS. This process can take a few days, so you may want to purchase another temporary domain to allow you to immediately continue with this guide.
If your AWS account if relatively new, purchasing a domain may fail with a vague “Failed” error. AWS limits domain purchases for organizations that have not yet paid their first bill, but you can open a ticket requesting access and AWS support will unlock your account within 24 hours.
Login to your
productionaccount in the AWS web console (or whichever account will host your client-facing infrastructure).Navigate to Route 53 > Registered domains.
Select “Register domains.”
Search for the domain(s) you want to purchase and add them to your cart.
Checkout and ensure you enable auto-renew.
Deploy the AWS Registered Domains Module
To use your domain registrations in IaC and to align them with best practices, we will now deploy the aws_registered_domains module.
This module will not register / unregister domains, only update the registration settings. In addition, it will set up the root hosted zones and enable DNSSEC to prevent domain hijacking.
If you are already serving live DNS records for a domain out of an AWS Route53 zone for your purchased domain, run
terragrunt import aws_route53_zone.zones\[\"<your_domain>\"\] <your_hosted_zone_id>AFTER you set up the module but BEFORE running terragrunt apply.
Replace <your_domain> with your domain name and <your_hosted_zone_id> with the ID of the hosted zone:
This will ensure that your zone won’t be replaced and break your existing DNS setup.
Let’s deploy the module now:
When you purchased your domain name, AWS may have automatically set up a hosted zone for you. You should delete the automatically generated zone as this module will create one for you.
Add a new
aws_registered_domainsfolder to yourproductionenvironment in theglobalregion.Add a new
terragrunt.hclfile that looks like this:9 collapsed linesinclude "panfactum" {path = find_in_parent_folders("panfactum.hcl")expose = true}terraform {source = include.panfactum.locals.pf_stack_source}// Note that we use sops-encrypted values here as we did in the `aws_account` module. It is up to you what you// leave encrypted / unencrypted throughout this guide. However,// if you choose to use encrypted values, ensure that you create an encrypted `secrets.yaml`.locals {secrets = yamldecode(sops_decrypt_file("${get_terragrunt_dir()}/secrets.yaml"))organization = "REPLACE_ME"contact_first_name = "REPLACE_ME"contact_last_name = "REPLACE_ME"country_code = "REPLACE_ME"}inputs = {domain_names = ["REPLACE_ME"]// Note that this do NOT all need to be the same, but they can beadmin_organization_name = local.organizationadmin_first_name = local.contact_first_nameadmin_last_name = local.contact_last_nameadmin_email_address = local.secrets.email_addressadmin_phone_number = local.secrets.phone_numberadmin_address_line_1 = local.secrets.address_line_1admin_city = local.secrets.cityadmin_state = local.secrets.stateadmin_zip_code = local.secrets.postal_codeadmin_country_code = local.country_coderegistrant_organization_name = local.organizationregistrant_first_name = local.contact_first_nameregistrant_last_name = local.contact_last_nameregistrant_email_address = local.secrets.email_addressregistrant_phone_number = local.secrets.phone_numberregistrant_address_line_1 = local.secrets.address_line_1registrant_city = local.secrets.cityregistrant_state = local.secrets.stateregistrant_zip_code = local.secrets.postal_coderegistrant_country_code = local.country_codetech_organization_name = local.organizationtech_first_name = local.contact_first_nametech_last_name = local.contact_last_nametech_email_address = local.secrets.email_addresstech_phone_number = local.secrets.phone_numbertech_address_line_1 = local.secrets.address_line_1tech_city = local.secrets.citytech_state = local.secrets.statetech_zip_code = local.secrets.postal_codetech_country_code = local.country_code}address_line_1: ENC[AES256_GCM,data:/gV4Nzpiqam7RJuQpuLZvA==,iv:DCcQ1CVck5ApoupeOvsveXKSmFBhsvKh7lW6n4ArKIE=,tag:lK8vZjHe7cBgWypDi1TLfw==,type:str]city: ENC[AES256_GCM,data:foB1bIiTYQSY5oMu,iv:vKvwrNt0yn0asPkJysTUJh7cQiHXoKe9uuQSCtG5rWo=,tag:01xygD8insWf2noW/TA69g==,type:str]state: ENC[AES256_GCM,data:/jc=,iv:oUc49cYz/3wX6LW5U8IeP8AiIMUUa1pjUiOt6gFcwuU=,tag:/Mp8FyRfFW+aNJ9qrHRTnQ==,type:str]postal_code: ENC[AES256_GCM,data:jQsDUyM=,iv:yx8ZRJvFcvydePs6S1oyaOw551c3XyZ7mK9NLNWQtdI=,tag:9rfvLSUxF+/XBfH+owqejQ==,type:str]phone_number: ENC[AES256_GCM,data:/OpDy4H4pgr21TjmSA==,iv:1OHDjb++H/kCKpBGostFTZ1QezzhL8nf4UWT1zSlUi4=,tag:1XO0cqOzhHk+nD+ESmjo9w==,type:str]email_address: ENC[AES256_GCM,data:LgWpTizdx0GKpkB98Ldv+CaK,iv:ixAAT+PByoy6BijLCaGGTPDzIuugZBG3yLTFqg3gWy4=,tag:wj+b32v8y6pM6CxOgTG7zA==,type:str]sops:kms:- arn: arn:aws:kms:us-east-2:891377197483:key/mrk-d8075b5c1dc8468db33448f40ae92b5ccreated_at: "2024-04-05T14:25:52Z"enc: AQICAHiO33BhcW4FdrQk4VmdZqD44nTqvEUzee/kwr4reXJeMQEKyjuS1S0wj4XoBY7+4maxAAAAfjB8BgkqhkiG9w0BBwagbzBtAgEAMGgGCSqGSIb3DQEHATAeBglghkgBZQMEAS4wEQQMYOOt558m53s0GXFYAgEQgDuk0n7mrG+pCAcwy+E6xoHIRvmGfkWsVRV/cElJa31QyvRcp0IzrA+dN7n8n1qsiFclTPL2HdLJrDvCXQ==aws_profile: production-superuser- arn: arn:aws:kms:us-west-2:891377197483:key/mrk-d8075b5c1dc8468db33448f40ae92b5ccreated_at: "2024-04-05T14:25:52Z"enc: AQICAHiO33BhcW4FdrQk4VmdZqD44nTqvEUzee/kwr4reXJeMQG70pH8ZCo3ZS40JLDOWgocAAAAfjB8BgkqhkiG9w0BBwagbzBtAgEAMGgGCSqGSIb3DQEHATAeBglghkgBZQMEAS4wEQQMY6+hZP/N/X7Mof2TAgEQgDtOqjSKIDVoinwFrW+8lXR3LKL3HqzJFtV77Czl8uaa+e5LHFCrEbHy7Tpq/GQGtBlr99UifceGm6v5zA==aws_profile: production-superusergcp_kms: []azure_kv: []hc_vault: []age: []lastmodified: "2024-04-05T14:25:52Z"mac: ENC[AES256_GCM,data:GwkLspWC59AAjhgTTShUPN1cSuW0OzNOGws/+OSY6+ZLzwEGYHuH0GPo+reoH+Dxy7GejCuymIxQsp9ClYT0W9xJM/Nx/c53ddrcijCyVt/aO8/b93B+cs6b0wv2LlUZfA4QQd6aUoyTB/VlkNrZBT67oUHLrZ4O76A5CoTFV/o=,iv:iGuVrPkJlw6i1+Ot9jX+qlsmLwVMq6LhmlN8pPxTJO4=,tag:KU4ZhKAqLGhJDCSNrnZWBg==,type:str]pgp: []unencrypted_suffix: _unencryptedversion: 3.8.1Run
pf-tf-initto enable the required providers.Run
terragrunt apply.
Due to delays in DNS propagation, this module may fail on the first apply. Wait a minute and then try to apply the module again.
Once you deploy this module, you will receive an email from AWS to the email address(s) you indicated. You MUST verify your emails within 15 days if you want to avoid service disruptions.
Verify DNS Resolution Works
To verify that everything is working as expected:
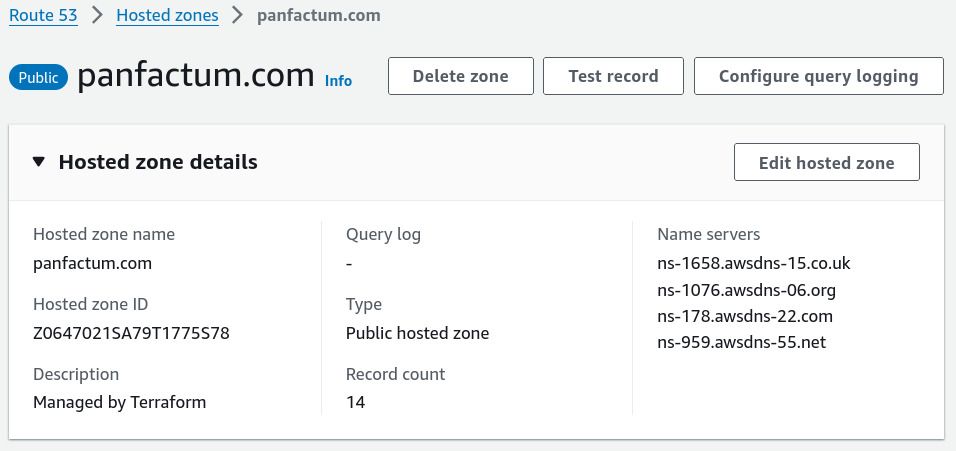
Navigate to the hosted zone via the AWS web console (Route 53 > Hosted Zone).
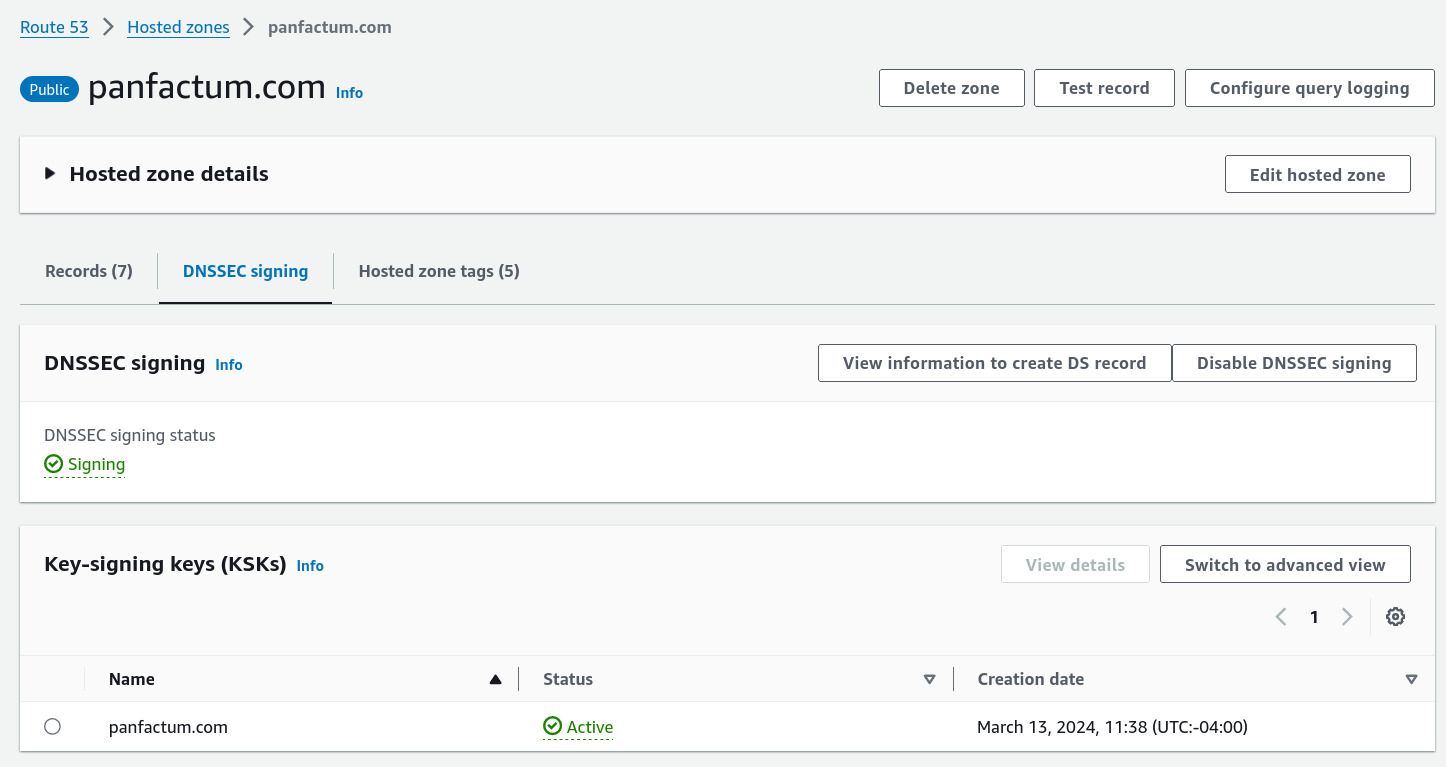
View the DNSSEC signing section. It should appear as follows:
Add a new
Arecord undertestpointing to1.1.1.1to your hosted zone via the AWS management console.
Run
delv @1.1.1.1 test.panfactum.com(replacepanfactum.comwith your domain name). You should see a result that looks as follows:Terminal window ; fully validatedtest.panfactum.com. 300 IN A 1.1.1.1test.panfactum.com. 300 IN RRSIG A 13 3 300 20240322220955 20240322200455 11333 panfactum.com. NX8hwISu5w6ZhHKPsawBMeb3XarIMZiDzv1Rxlb584vQgziAx67aX8KK xPS6vQlMtW6jwfWOrhNYLHTrEpIKww==The presence of
; fully validatedverifies that DNSSEC is working as intended. TheRRSIGrecord is the digital signature for the record set.It can take a few minutes for DNS records to become available from all locations. If the tests in this section do not immediately work, try again in 15 minutes.
Remove the test record.
Set Up Delegated Zones
Each environment will have its own subdomain for each root domain (e.g., dev.panfactum.com). This subdomain will be managed by its own hosted zone (not the root hosted zone). This provides the following benefits:
Limits the blast radius if something is misconfigured. At most, a configuration problem will impact only a single environment without the possibility of impacting other environments (or worse, your entire DNS infrastructure).
Limits the permissions needed to be granted to users and services in each environment. To add records to the subdomain
dev.panfactum.com, a user would not need any access to records in other environments. This would not be possible if all records were stored in a single, global hosted zone.
This is accomplished via a concept called subdomain delegation. Panfactum’s aws_delegated_zones will provide the relevant setup for this to work.
Let’s do this now for every environment:
Choose a set of subdomain identifiers. For example, for
productionyou might use the subdomainsprodandproduction.Add a new directory in
production/globalcalledaws_delegated_zones_<environment>where<environment>is replaced with the environment name for this set of subdomains.Create a
terragrunt.hclin that directory that looks like this:9 collapsed linesinclude "panfactum" {path = find_in_parent_folders("panfactum.hcl")expose = true}terraform {source = include.panfactum.locals.pf_stack_source}dependency "root_domains" {config_path = "../aws_registered_domains"}inputs = {root_domain_names = keys(dependency.root_domains.outputs.domains)subdomain_identifiers = ["prod", "production"]}9 collapsed linesinclude "panfactum" {path = find_in_parent_folders("panfactum.hcl")expose = true}terraform {source = include.panfactum.locals.pf_stack_source}dependency "root_domains" {config_path = "../aws_registered_domains"}inputs = {root_domain_names = keys(dependency.root_domains.outputs.domains)subdomain_identifiers = ["dev", "development"]}Use the appropriate
subdomain_identifiersfor your environment.Create a
module.yamlin that directory:aws_account_id: "REPLACE_ME" # Should be the PRODUCTION environment's account idaws_profile: REPLACE_ME # Should be the PRODUCTION environment's AWS profile (e.g., production-superuser)# Required since we are using a directory name `aws_delegated_zones_production` that# is different from the Panfactum module `aws_delegated_zones`module: aws_delegated_zonesaws_account_id: "REPLACE_ME" # Should be the DEVELOPMENT environment's account idaws_profile: REPLACE_ME # Should be the DEVELOPMENT environment's AWS profile (e.g., production-superuser)# Required since we are using a directory name `aws_delegated_zones_development` that# is different from the Panfactum module `aws_delegated_zones`module: aws_delegated_zonesSet the
aws_account_idandaws_profileto the appropriate values for the target environment.For example, if setting up
aws_delegated_zones_development, theaws_account_idshould be set to your development account and theaws_profileshould be set to your profile for creating resources in the development account (e.g.,development-superuser).Note that this module deploys resources in multiple accounts: it uses the primary
awsprovider to deploy the hosted zones in the target environment account and the secondaryawsprovider to deploy the appropriate DNS records in root hosted zone inside theproductionenvironment.Run
pf-tf-initto enable the required providers.Run
terragrunt apply.
Verify DNS Resolution Works (Subdomains)
To verify that everything is working as expected, follow the guide from the previous section but for the subdomain zone. This will require you to log in to the respective AWS account.
You would test via delv @1.1.1.1 test.<your_subdomain_identifier>.<your_root_domain>. Ensure that this shows both the return A record and the dnssec signature.
Deploy Records
If you have static records to deploy, you can use our aws_dns_records module to deploy them to the appropriate hosted zone.
Specifically, now would be a good time to migrate and/or set up your MX records for your primary email provider.
In the future, we will set up a mechanism to ensure that DNS records for all of our Panfactum stack infrastructure is automatically deployed and updated without manual intervention.
Next Steps
Now that you have prepared your DNS configuration, we are ready to begin setting up the Panfactum stack. Our next step is to configure AWS networking by creating a Virtual Private Cloud (VPC).